Editing Course Tables
The course selector is not editable like other text based content. Courses are added with the selector to create a link between the course and program. Whenever course information is changed in the course description section of the catalog, that information will update the course titles, credits, numbers, and codes of the courses in the programs automatically. This prevents any inconsistency of course information between programs. Additionally, if a course needs to be deleted a warning popup will tell you that the course is located in a course table and needs to be updated or deleted (see Editing Courses).
How to Edit Course Tables:
- Select Requirement List within the Program that requires editing.
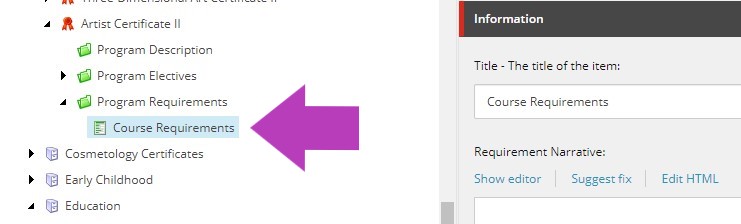
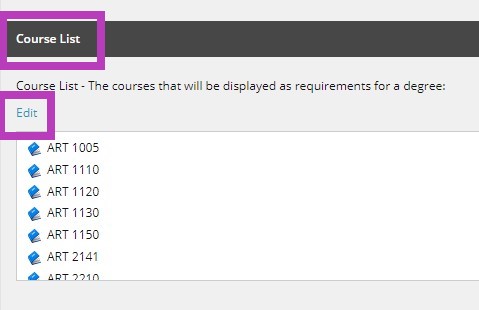
- Lock and Edit the Requirement List and scroll down to the Course List.
- Click Edit to open the Course Selector for this table.
- Once the Selector is open, dig into the catalog in the left hand window to access the appropriate Course folder. The courses selected must be from the same catalog of the program that is being edited.
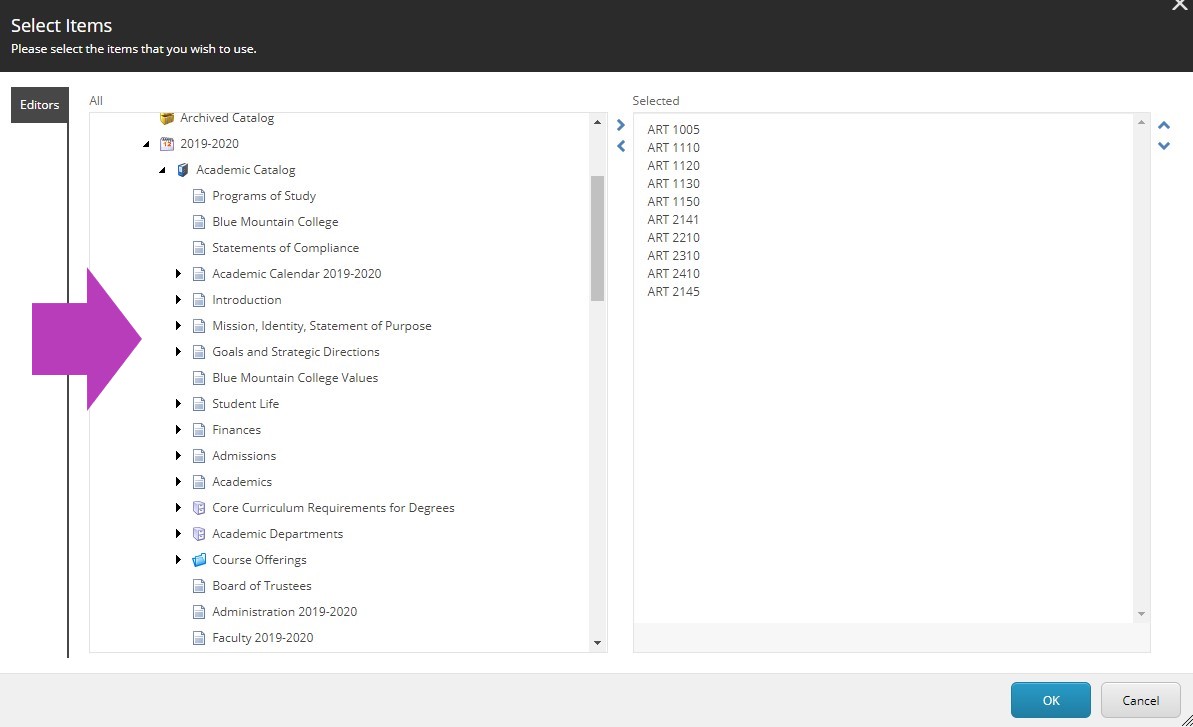
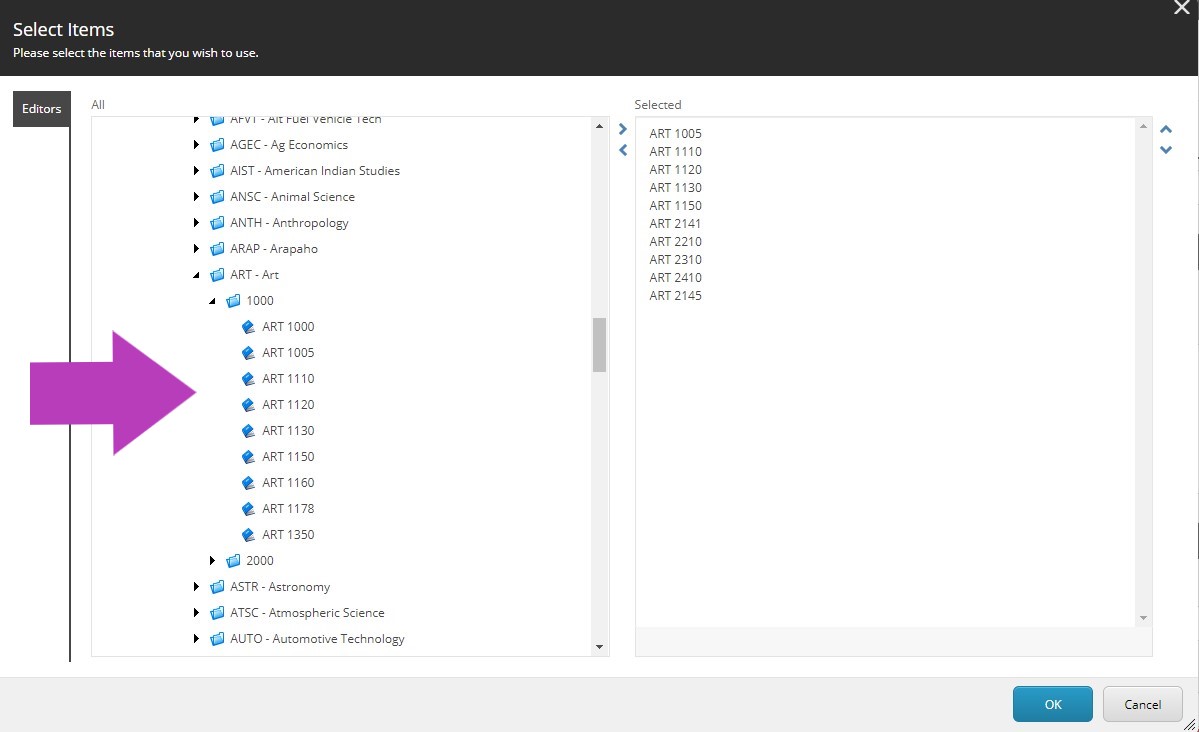
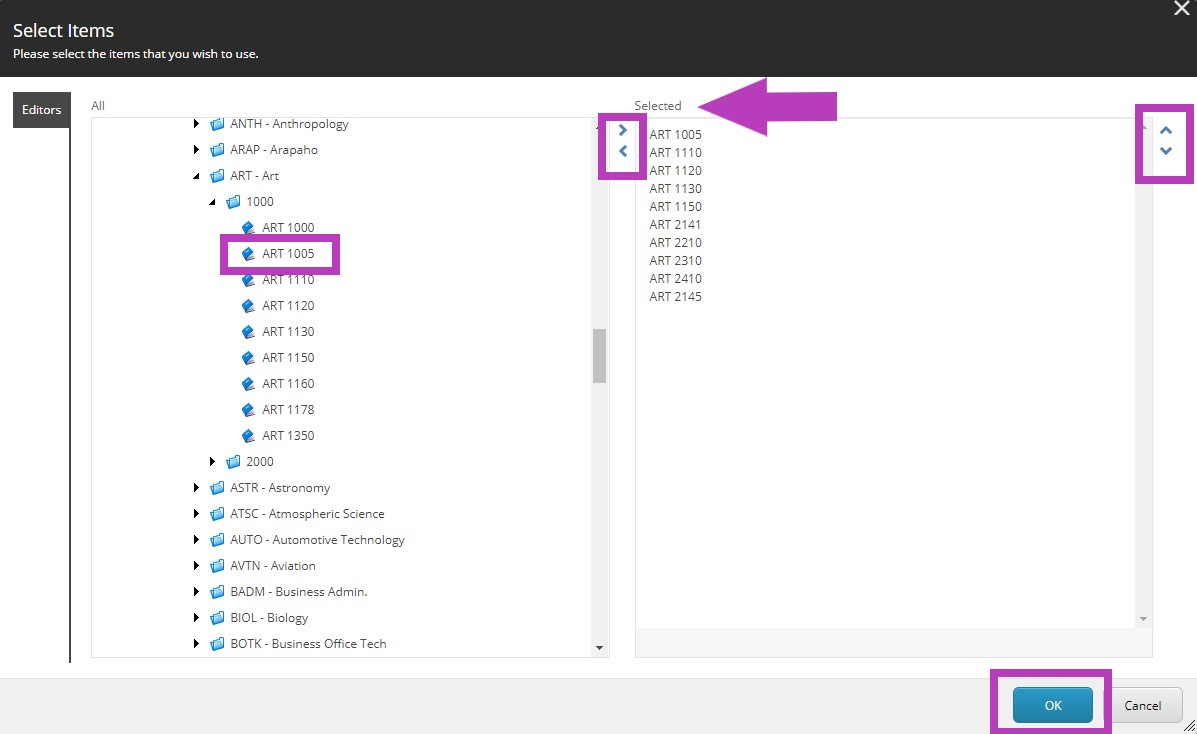
- Dig into the Course Folder, and either double click the courses that need to be added, or use the blue add/remove buttons in the middle of the windows to move them into the "Selected" window.
- To remove courses from the Selected window, double click them or use the remove arrow (the arrow pointing left) in the middle of the windows.
- To resort the courses within the Selected window, use the sorting buttons on the right hand side of the Selected window.
- Once the editing is finished for this table, Click OK. Save your edits, and promote the item in workflow so it can be approved.
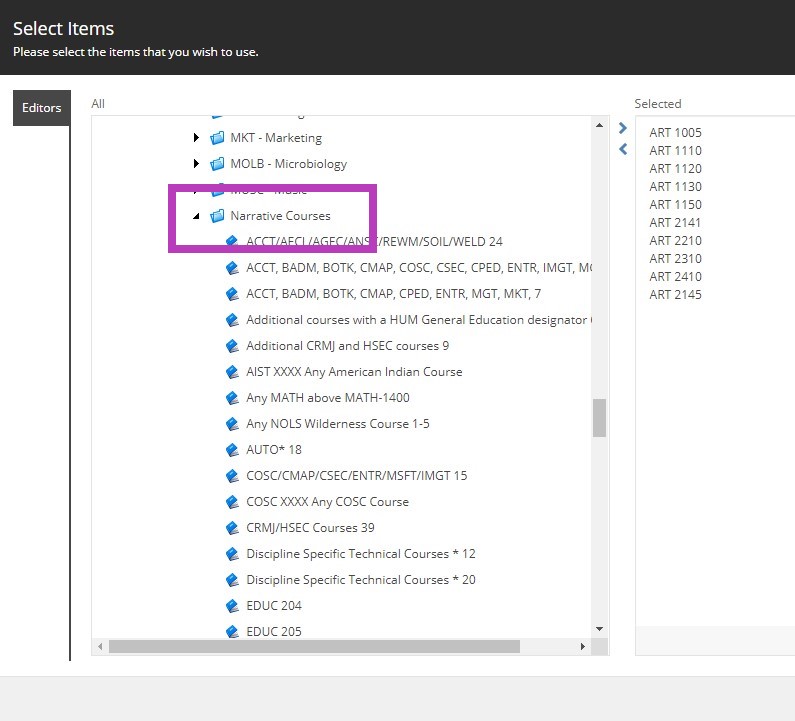
| When Narrative Courses, such as AND, OR and other elective or course suggestions that are not actual courses need to be added to the course table, these can be selected from the Narrative Course folder, among the subject code folders, and added to the "Selected" window and resorted using the same sorting buttons on the right hand side of this window. |
Save your changes with the Save button in the upper left hand corner of your tool ribbon. If you navigate away from the item you have been editing, the system will alert you to save your work.
Note that this will not show on the live site until it is formally approved and published by an admin.
The item being edited is available for editing until submitted through workflow.