Adding a New Program
Please note
This initial naming of a newly created item is the Rename field which represents the URL/path of this new item.
No punctuation is permitted in this initial name but can be entered into the Title field and Display Name field once the new item has been created.
Please see Editing Title Textbox for more information on updating the naming fields.
A new access role will not be automatically created with a new section/program/course subject code. When creating new items in the catalog, you will need to manually create a new role IF a user will need individual access to the new item. Once the role is created, you will be able to assign it to the user profile of the user who will need access.
Option 1: Duplicate an Existing Program
- Select the program that best represents the new program you will be creating. Ideally you want the structures to be close to or exactly the same.
- Right click and select “Duplicate”. Or select the program from the content tree and use the “Duplicate” button within the Home tab.

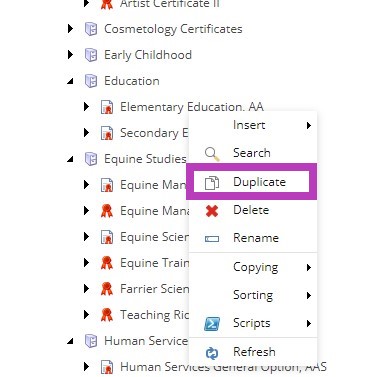
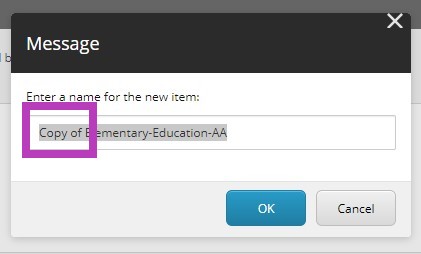
- When the item is duplicated, the ability to edit the Rename of the item will pop up in a dialog window. Once you enter the new name of the degree (excluding any punctuation because this will be the URL/path of the new degree), the degree will be created. Once created, do not forget to edit the Title field and Display Name of the new degree as well (see Editing the Title Textbox).
NOTE: If you do not change the Rename initially it will say "Copy of" in the Rename, it is important to update this name to keep the URL clean and consistent.
- Now you have the complete structure for the new degree, each item can be edited as needed. Requirement Lists and Degree Requirement Folders can be added/deleted as needed to mimic the new degrees requirements.
NOTE: Remember to edit the Title field, Display Name and Rename of each item when you have duplicated a program, especially the degree parent item to distinguish the new degree from the original it was duplicated from.
Option 2: Building a New Program Structure
- Right click on the Department/Division that the new degree will reside within. Select “Insert”, and then select the appropriate degree template that you will need.
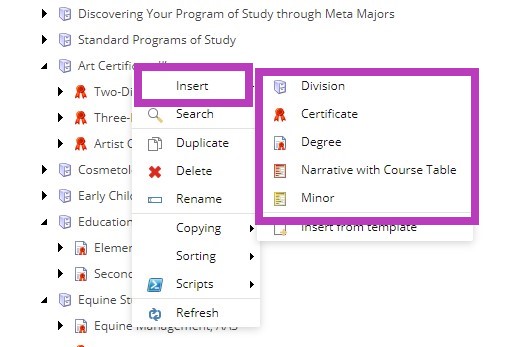
You can also select the Department/Division from the Content Tree that will hold the new degree and use the “Insert” selections supplied within the Home tab.
- Once the desired template for the degree title is chosen, a dialog window will open for you to name the new degree. Enter the name without punctuation, punctuation will then be able to be entered within the Title field and the Display Name field once the item has been created (see Editing the Title Textbox).
- Once the new degree title item is created and present within the Content Tree, right click or select it and choose the Degree Requirements Folder within the Insert options. Name it as needed.
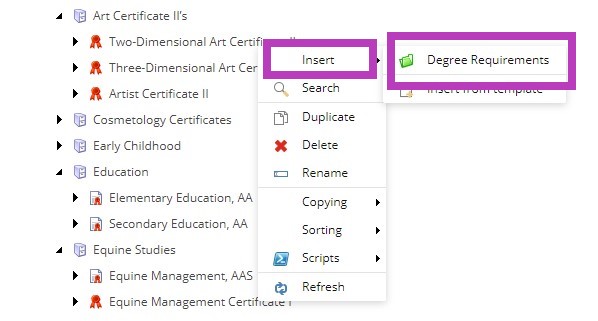
- Once the Degree Requirements item has been created, right click upon it or select it and choose the Requirements List from the Insert options. This will be the first Course Table on the program page (see Editing Course Tables).
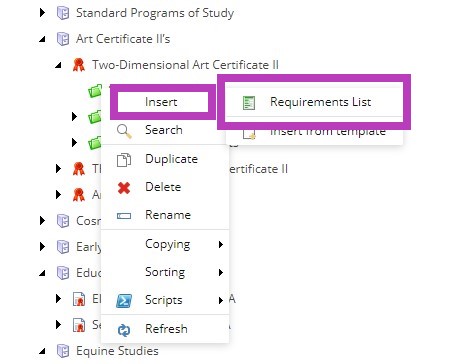
- Continue this process to produce the desired program structure needed. You can input content and courses as you go or wait until you have the entire structure created before editing each piece.