The course descriptions are located in a blue course folder within the catalog. The course folders are organized by subject code/name and course level (100, 200, 300, etc.). Courses are structured this way for easy accessibility by the reader and editor.
Deleting a Course
When deleting a course it is very important to choose to Remove Links when making this removal.
This will remove it from all of the programs and other courses it is linking to as well as avoid any broken links within the catalog. Broken links affect the program tables and Word export.
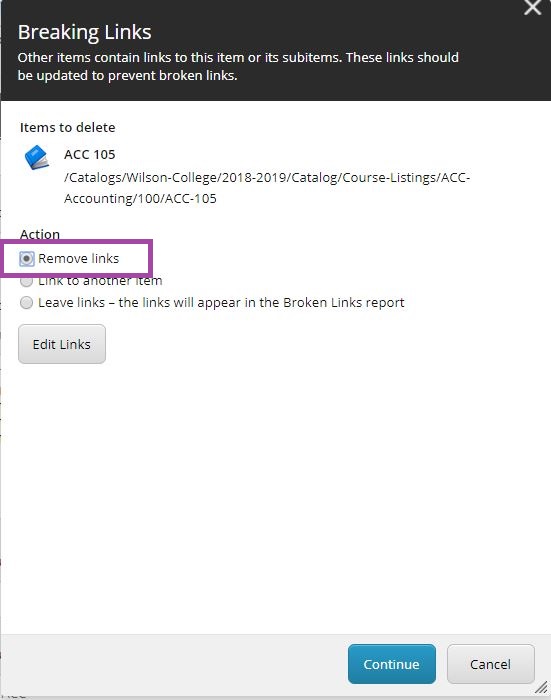
When deleting a course, if it is linked to programs or other courses throughout the catalog, a pop up will open to warn you of the links being broken.
If you wish to remove all of the links without review and continue with the deletion, choose the radio button option to Remove Links as seen in the image below and then continue until the course is deleted:
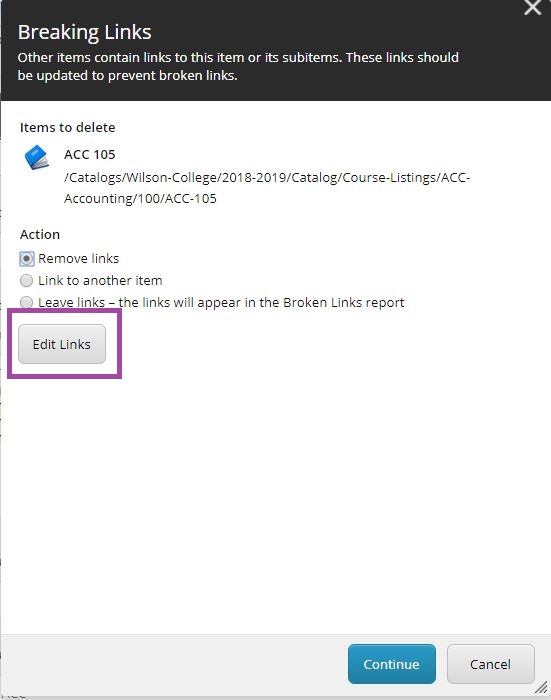
If you wish to review the links prior to continuing the deletion, click the Edit Links button and a new window will allow you to see each catalog item the course is linking to:
Each link will have an individual button for removing the link or linking the program to another course:
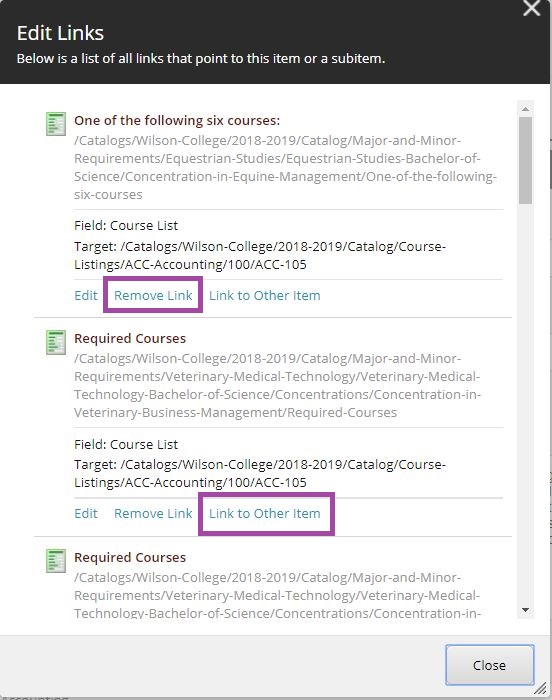
Once the list has been cleared, you can continue with the deletion of the course.
Editing/Adding a Course
Creating a new course and editing an existing course follow the same principles. The only difference is information needs to be added to a new course, while an existing course only needs to be updated or deleted (see Deleting Items). For more information what each field means, see Course Fields.
If submitting a CSV to update and create new courses, the following is not needed unless you are making manual changes. CSV imports will override any manual changes made.
Adding a New Course
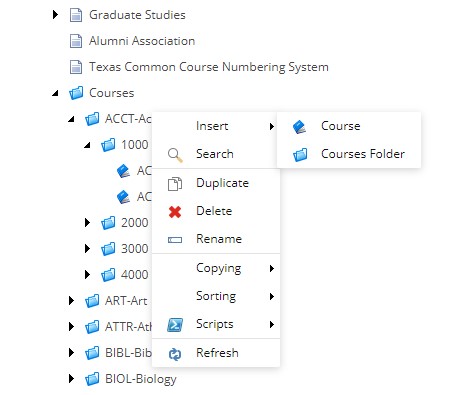
Right click the correct course level folder in the subject code folder you want to add the course. Select Insert, then select Course. Enter the Subject Code and Course Number of the new course into the initial naming field.
NOTE: Do NOT add the title or any other information for the course in the initial naming field. When adding a new course ONLY add the Subject Code and Number. This is important for the system to identify the course once it has been created.
This initial naming of a newly created item is the Rename field which represents the URL/path of this new item.
No punctuation is permitted in this initial name but can be entered into the Title field and Display Name field once the new item has been created.
Please see Editing Title Textbox for more information on updating the naming fields.
Once the new course has been created, move the Subject Code and Course Number from the Course Name field to the correct fields. Add the name from the subject code folder into the Subject Name field.
Add text to the course name, description, credits, and any other relevant fields. Use the instructions listed below in Editing Course Fields.
Editing Course Fields
Referring to another course in the catalog can be helpful to see how and what fields are typically used for the courses in your institution's catalog.
For a full list of fields and how they are typically used, see Course Fields.
Changing the Course Name: Unlike narrative and program sections, when you change the title/course name to a course you do NOT want to change the display name and rename fields. Courses are identified by their subject code and number, which is why only the title field should be edited if you are changing the course name. Note: If the Subject Code or Course Number of a course changes, you then need to update the Rename and Display Name buttons located in the Home tab with these changes as well as the Subject Code and Course Number fields.
Editing the Description: Editing the description is the same as editing any basic content section in the catalog. Start by opening the rich text editor with the Show Editor button and follow the instructions located in "Editing Content in the Rich Text Editor."
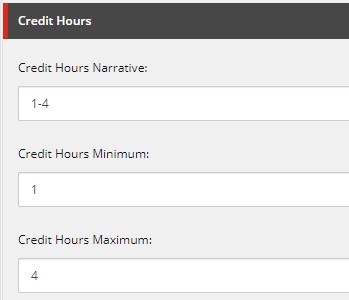
Adding Credits: The Credit Hour Narrative field uses both Letters and Numbers, and will appear in the course tables and in print. It is best practice to include the credit hours in the minimum and maximum fields if numbers are used in the credit hour narrative field. However, the minimum and maximum fields are for calculating credit hours if the auto-calculate checkbox is being checked for some or all of your program tables. We do not always recommend that this box is checked.
Prerequisites and Corequisites: The narrative field is used to list and describe any requirements or co-requirements, course or text, for taking the course. If any courses are used in that field the course(s) needs to be added with the course selector to create a link. Do not use Narrative Courses in this course selector.
For a more thorough explanation on how to use the course selector, see Editing Course Tables.
Cross Listed Courses: Cross Listed Courses are for courses that are considered the same. They will appear in the program tables wherever the other one is listed if it is linked using the course selector. To ensure a course links in the Cross Listed Narrative field, it must be added to the course selector or it will not link.
Please Note: A new access role will not be automatically created with a new section/program/course subject code. When creating new items in the catalog, you will need to manually create a new role IF a user will need individual access to the new item. Once the role is created, you will be able to assign it to the user profile of the user who will need access.
Editing/Adding a Narrative Course
Narrative courses are similar to regular courses, but are fundamentally different. Narrative courses are program/course requirement information that belongs in a course table, but are not courses themselves. Subject Code, Course Number, Course Name, and Credits are all fields that can be used and will show in the program table. Additionally, Narrative Courses are kept in a separate folder to prevent them from becoming a live link in the program tables, as well as excluding them from the websites navigation and exporting to print.
These Narrative Courses are added to program tables exactly as other courses are added, via the course selector for the Requirement Lists. They all reside in a blue folder among the Subject Code course folders labeled "Narrative Courses".
For Example:
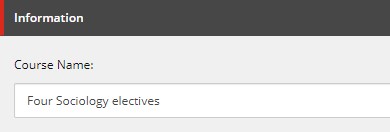
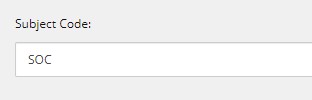
Four Sociology electives (12 cr)
This Narrative Course can be populated in three fields that will display within the program table when assigned: Course Name, Subject Code, and Credits.

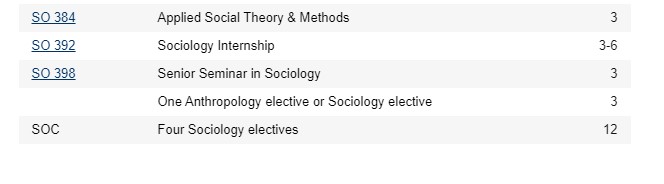
Here is how this narrative course would look on the live site within the program table:
Types of Narrative Courses
And
Or
Science Elective 3(credits)
PSY 100-level Elective 3
Internship Pass/Fail
Course Fields
Basic Fields
There are four basic fields that are required when populating courses. These are Subject Code, Subject Name, Course Name and Course Number. Most of the fields listed below are offered, but not required and do not have to be used.
Course Name: This is the title of the course and will automatically appear if it is located in a programs course table. Editing this field will update the title of a course wherever it is located in a program table throughout the catalog.
Course Number: This is the unique number for the course (No two courses can have the same subject code and number). Changes made to this field will be reflected whenever it is located in a course table. The field can contain both numbers and letters.
Course Description: Just like editing a narrative section, the rich text editor will need to be opened to edit the course description (see Editing Content in the Rich Text Editor).
Subject Name: The subject name describes or is the name of the subject code. For example, the subject name for BIO might be Biology. This is important for the grouping of courses and is also listed in the title of the subject code folder.
Subject Code: This code describes what type of course is being offered. Changes made to this field will be reflected whenever it is located in a course table.
Offered: This field is generally used to describe when the course offered (spring, fall, summer, etc.). It can also be related to how the course is offered (online, evening, off-campus, etc.).
Distribution: This field is often used to describe how a course is related to a specific requirement or elective. Common uses are indicating whether a course is part of the general education, liberal arts requirements or specific sections of these.
Instructor: This field is for naming the instructor(s) of the course.
Notes: Any specific notes related to the course can be added to this field. Just like editing a narrative section, the rich text editor will need to be opened to edit the notes field (see Editing Content in the Rich Text Editor).
Credit Hours Narrative: Numbers or letters can be used. Credit information and changes added to this field will be reflected in program tables throughout the catalog.
Credit Hours Minimum and Maximum: These are used for calculations only (if auto-calculate credit hours is being used). Only numbers can be used in this field.
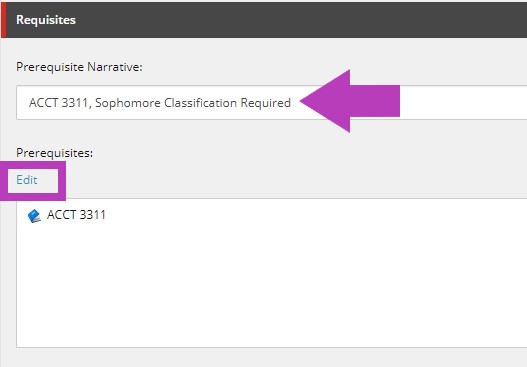
Prerequisite Narrative: This field is used to describe what prerequisites or requirements are needed to take the course. Any content added to this field will appear on the course page and in the course popup.
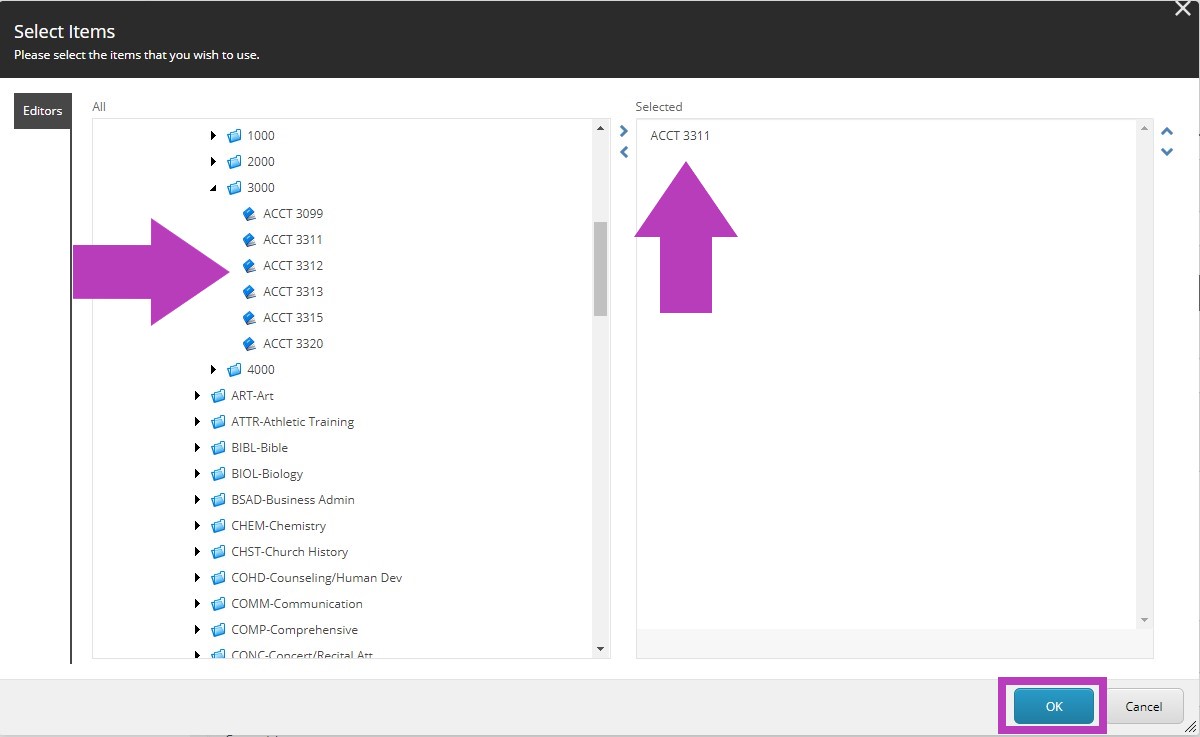
Prerequisites: Any courses listed in the prerequisite narrative field needs to be added to this section to create a link within the narrative. Clicking the Edit button will open up the course selector. Follow the same steps as Editing Course Tables. This will create a link to the courses listed in the prerequisite narrative field.
Corequisite Narrative: This field is used to describe what corequisites or requirements are needed to be taken at the same time as this course. Any content added to this field will appear on the course page and in the course popup.
Corequisites: Any courses listed in the corequisite narrative field needs to be added to this section to create a link within the narrative. Clicking the Edit button will open up the course selector. Follow the same steps as Editing Course Tables. This will create a link to the courses listed in the corequisite narrative field.
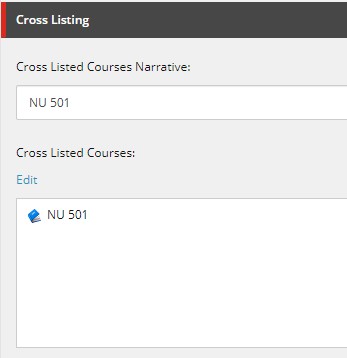
Cross Listed Courses Narrative: Any other courses considered to be the same course should be listed here. Any content added to this field will appear on the course page and in the course popup.
Cross Listed Courses: Any courses listed in the cross listed courses narrative field needs to be added to this section. Clicking the Edit button will open up the course selector. Follow the same steps as Editing Course Tables. This will create a link to the courses listed in the cross listed courses narrative field. Additionally, any courses added to this field will appear next to the original course in the course tables.
Special Fields
Special fields are school specific and can be created upon request. Listed below are some of the more commonly requested fields.
Indicators: Indicators can be added to courses, but be aware that indicators will be present everywhere that course is located in a program table.
Lab Hours: Number of lab hours
Lecture Hours: Number of lecture hours
Fees: Cost or additional costs to taking the course
Attributes: What requirement(s) does this course meet?
Checking Course Links
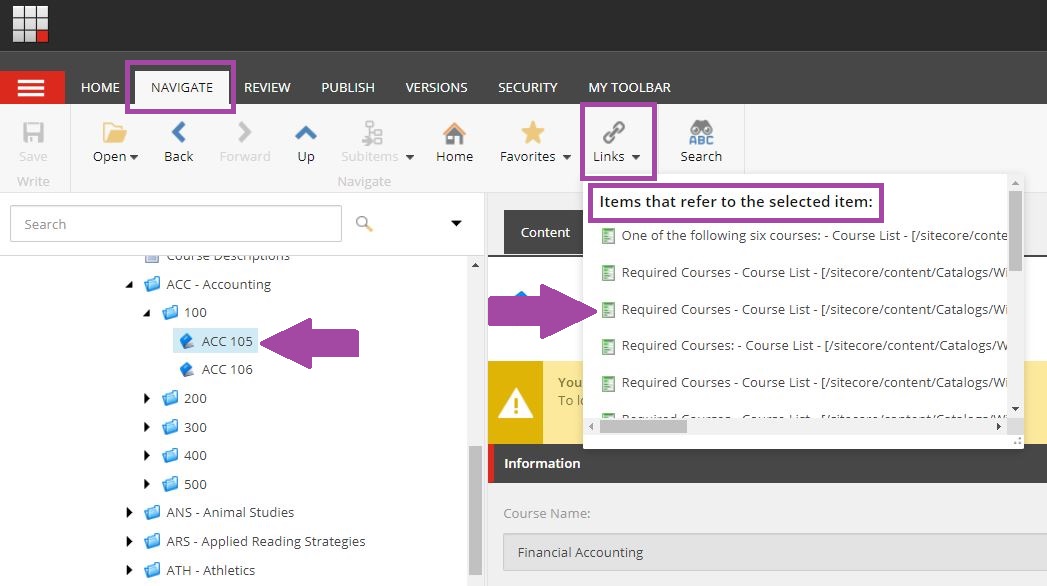
When investigating what programs/courses a specific course is linked to, the Links button within the Navigate tab will produce a list if the course is linked via a course selector to a program table or a requisite list.

Select the course within the content tree and click the Links button within the Navigate tab.
A drop down will display a list under the heading Items that refer to the selected item if the selected course is linked to any program tables or requisite lists throughout the catalog. When an item from this list is selected, it will also be selected within the content tree and the item will open within the display window. You can preview the item in another tab after selection to see it as it will appear published in a live catalog.
The Links button will also work to see if a content page is being linked to/referenced by another page within the catalog. This can be helpful if you are updating a Rename field and need to find where the page is referenced to update the link. Selecting the page from the Links List will open it and allow you access to the content in order to update the referenced link.

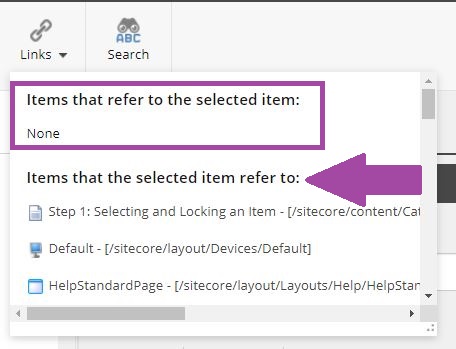
When using the Links button, we are only looking for items that are listed within the Items that refer to the selected item, we can ignore the list that is within the Items that the selected item refer to. This list is back end renderings and features that create the display page but do not concern us when searching for links.
If there are no items within the catalog that reference the selected item, "None" will appear within the Items that refer to the selected item list.
Creating a New Subject Code
Adding a New Subject Code
Right click on the "Courses" folder. Select Insert, then select Courses Folder. Enter the Subject Code information. For example: "ART-Art" or "ART"

Please note: Once you have added an item within the catalog, be sure to approve and publish the item.
Renaming a Subject Code Folder
RENAMING
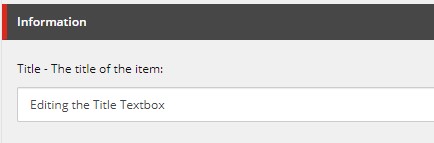
When changing the title of an item, it must be updated in a total of three places because they each serve different and important purposes with the name of the item. The first place to make this change would be the Title field. The Title field is part of most templates and is the field that displays the title on the live catalog page as well as in the Navigation Menu of the live catalog.
This field can simply be clicked within and a change can be typed or pasted as needed:
Please be aware when editing the Title field of an item, you will need to also update the Rename and Display Name fields. The instructions are below.
The other two fields are the Rename and Display Name and are easily accessed via two buttons within the Home Tab:

Please Note: Unless there is a specific reason for these names to be different, they are recommended to be kept the same for consistency.

Rename: This is the official system name. This name makes up and affects the URL/path of the item. Punctuation does not function in this field. This field grants the ability to condense the URL of the item if needed.
If an item is Renamed, the URL changes. Any pages that may be linking to that page will then have broken links and need to be updated. To see if/where the page is linked, use the Links button within the Navigate tab.

Display Name: For catalog user purposes only. This field changes the name that displays in the Content Tree for the visual purposes of all users maintaining the catalog content.
Please note: Once you have renamed an item within the catalog, be sure to approve and publish the item.