Creating a new course and editing an existing course follow the same principles. The only difference is information needs to be added to a new course, while an existing course only needs to be updated or deleted (see Deleting Items). For more information what each field means, see Course Fields.
If submitting a CSV to update and create new courses, the following is not needed unless you are making manual changes. CSV imports will override any manual changes made.
Adding a New Course
Right click the correct course level folder in the subject code folder you want to add the course. Select Insert, then select Course. Enter the Subject Code and Course Number of the new course into the initial naming field.
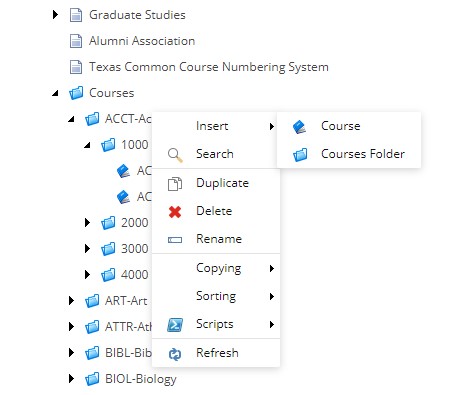
NOTE: Do NOT add the title or any other information for the course in the initial naming field. When adding a new course ONLY add the Subject Code and Number. This is important for the system to identify the course once it has been created.
This initial naming of a newly created item is the Rename field which represents the URL/path of this new item.
No punctuation is permitted in this initial name but can be entered into the Title field and Display Name field once the new item has been created.
Please see Editing Title Textbox for more information on updating the naming fields.
Once the new course has been created, move the Subject Code and Course Number from the Course Name field to the correct fields. Add the name from the subject code folder into the Subject Name field.
Add text to the course name, description, credits, and any other relevant fields. Use the instructions listed below in Editing Course Fields.
Editing Course Fields
Referring to another course in the catalog can be helpful to see how and what fields are typically used for the courses in your institution's catalog.
For a full list of fields and how they are typically used, see Course Fields.
Changing the Course Name: Unlike narrative and program sections, when you change the title/course name to a course you do NOT want to change the display name and rename fields. Courses are identified by their subject code and number, which is why only the title field should be edited if you are changing the course name. Note: If the Subject Code or Course Number of a course changes, you then need to update the Rename and Display Name buttons located in the Home tab with these changes as well as the Subject Code and Course Number fields.
Editing the Description: Editing the description is the same as editing any basic content section in the catalog. Start by opening the rich text editor with the Show Editor button and follow the instructions located in "Editing Content in the Rich Text Editor."
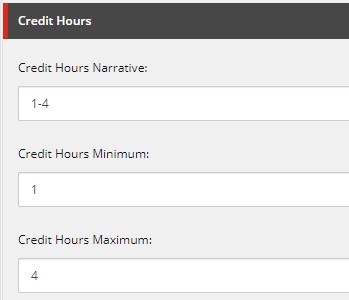
Adding Credits: The Credit Hour Narrative field uses both Letters and Numbers, and will appear in the course tables and in print. It is best practice to include the credit hours in the minimum and maximum fields if numbers are used in the credit hour narrative field. However, the minimum and maximum fields are for calculating credit hours if the auto-calculate checkbox is being checked for some or all of your program tables. We do not always recommend that this box is checked.
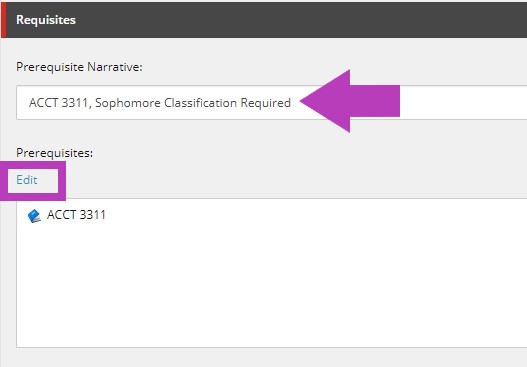
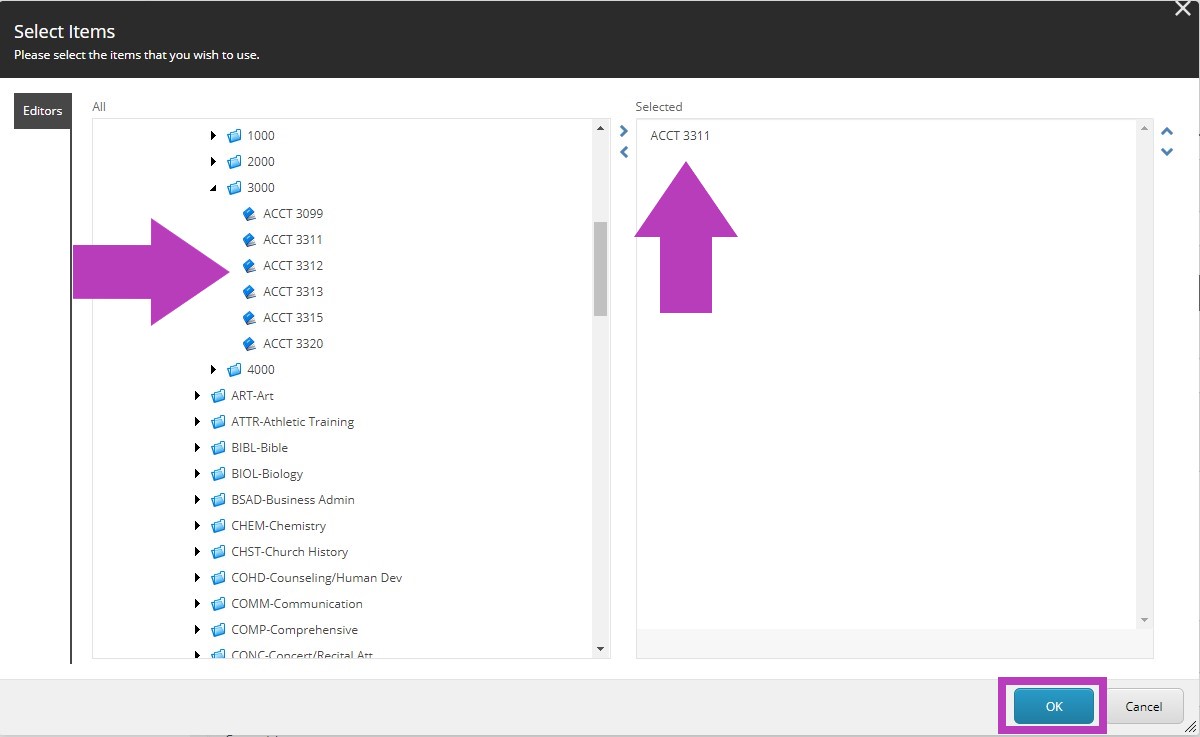
Prerequisites and Corequisites: The narrative field is used to list and describe any requirements or co-requirements, course or text, for taking the course. If any courses are used in that field the course(s) needs to be added with the course selector to create a link. Do not use Narrative Courses in this course selector.
For a more thorough explanation on how to use the course selector, see Editing Course Tables.
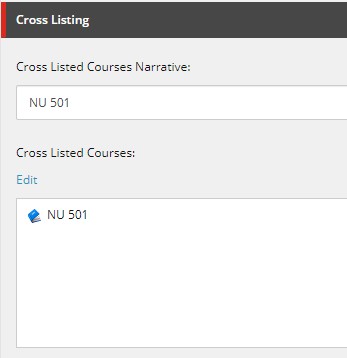
Cross Listed Courses: Cross Listed Courses are for courses that are considered the same. They will appear in the program tables wherever the other one is listed if it is linked using the course selector. To ensure a course links in the Cross Listed Narrative field, it must be added to the course selector or it will not link.

Please Note: A new access role will not be automatically created with a new section/program/course subject code. When creating new items in the catalog, you will need to manually create a new role IF a user will need individual access to the new item. Once the role is created, you will be able to assign it to the user profile of the user who will need access.