Microsoft Word is a well known and dynamic software for editing and creating documents. The IQ system exports content to Word, but please note that we are not Microsoft and may not be able to answer all of your questions. There are a lot of resources available online on for the uses and functions of Word. Below are some quick tips on ways to utilize Word.
Visit the Microsoft Word Support site for guidance: https://support.office.com/en-US/Word
For additional help watch their training videos.
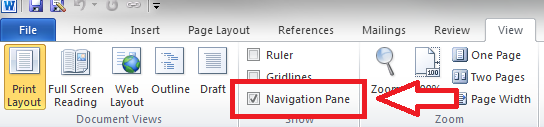
Navigation Pane
If you open the navigation pane, the layout and structure of the content tree in the IQ system is reflected in the layout of the navigation pane. It is easy to jump from section to section in the catalog to make changes. Additionally, the layout of these sections can be changed if you wish to move content around. Drag and drop headings to change the layout or right click to demote or promote items in the navigation.
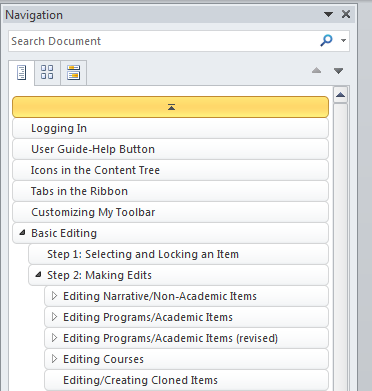
Using Word to find words, names, phrases, or titles that need to be changed:
Naming conventions can change over time and need to be updated in the catalog. Finding all the places a word occurs can be challenging. Thankfully, the navigation pane has a search bar. After entering a word into the search bar, it will tell you the number of instances the word occurs as well as highlight all of the relevant sections in yellow. Because the navigation pane reflects the content tree it is easy to navigate to the pages that need to be edited.
Tables
After export, tables from the content editor may need to be adjusted (adding lines, spacing, cell size, background colors, etc.). To do this, place your cursor anywhere in the table. A new tab should be visible at the top of the ribbon called Table Tools. The Design tab is used when adding lines, shading or style to a table. The Layout tab is used to add spacing, adjust cell width/height, change alignment or cell margins, and to convert the table to text.


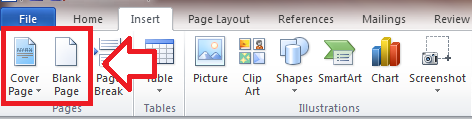
Adding a Cover Page
If you wish to add a cover page to your Catalog or Handbook, you should not move the Table of Contents(TOC). Under the Insert tab is a cover page button that opens a dropdown. Here you can choose a default cover page that will insert before the TOC.
Another option is to use the Blank Page button located next to the Cover Page button in the Insert tab. In order for this to work place your cursor at the beginning of the Table of Contents heading before selecting the button. If the cursor is placed in the middle of a paragraph or heading it will insert the page between the words or letters where the cursor is.
Inserting Pictures
After exporting, pictures/illustrations will need to be added.
Picture - A new window will open asking you to select an image to upload from your computer.
Clip Art - A bar on the left side of the screen will open with a search bar at the top. After entering a word in the seach bar and selecting GO, a variety of pictures will appear for you to choose from.
Shapes - A drop down opens with a variety of shapes and lines that can be added with your cursor.
SmartArt - A new window will open with a variety of default images with text fields.

Changing the Number of Columns
While making your final changes to the exported document you may find yourself wishing that certain text would display as one, two or three columns. Under the Page Layout tab is the Columns button. Select the text you wish to change and choose the number of columns from the drop down of the Columns button. If the cursor is placed in the text, but no text is highlighted (selected) it will change ALL text under the Heading 1 it is located under.

Margins
If you wish to change the margins of the entire document, select all of the text (Ctrl+A) and select the Margins button located under the Page Layout tab. Choose from the margin widths provided or select Custom Margins located at the bottom of the drop down if you want to specify the margin sizes.

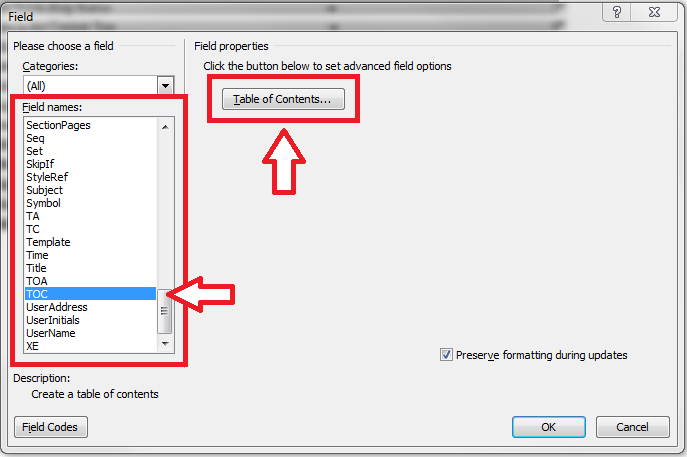
Updating the Table of Contents
Right click on the Table of Contents (TOC) and select Update Field.
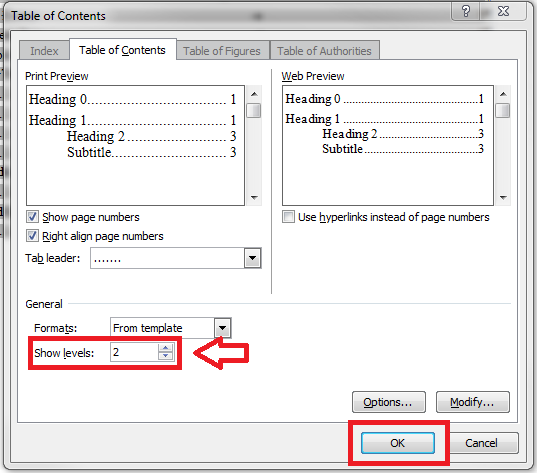
If you wish to add levels to your TOC, right click and select "Edit Field" to open the pop up. From the Field Names list located on the left side, select "TOC." The main part of the pop up should now have a button called "Table of Contents." Click the Table of Contents button not the OK button at the bottom. A new window will open. In the bottom left of the window select the number of levels you wish to add and click OK. It will now ask if you want to replace the selected table of contents. Select OK and your table of content will now be updated with levels.
Merge and Compare
Word has the ability to merge and compare two Word documents. This is helpful if you wish to see the changes made between two different years. Under the Review tab is the Compare button, select Compare from the drop down. A Compare Documents window will open for you to select what documents you wish to compare. Press okay to see the changes.


Shortcut Keys
Select all: Ctrl+A
Creating Table of Contents and Index: Select all (Ctrl+A), F9
Page Break: Ctrl+Enter
Column Break: Ctrl+Shift+Enter
Save: Ctrl+S
Undo: Ctrl+Z
Redo: Ctrl+Y