Each user has a "My Toolbar" located in their ribbon. This allows the user to customize their own toolbar and place all of the more commonly used buttons in whatever order they wish. This keeps everything you need in one location, preventing you from having to navigate between tabs in the ribbon.
Adding Your Tools
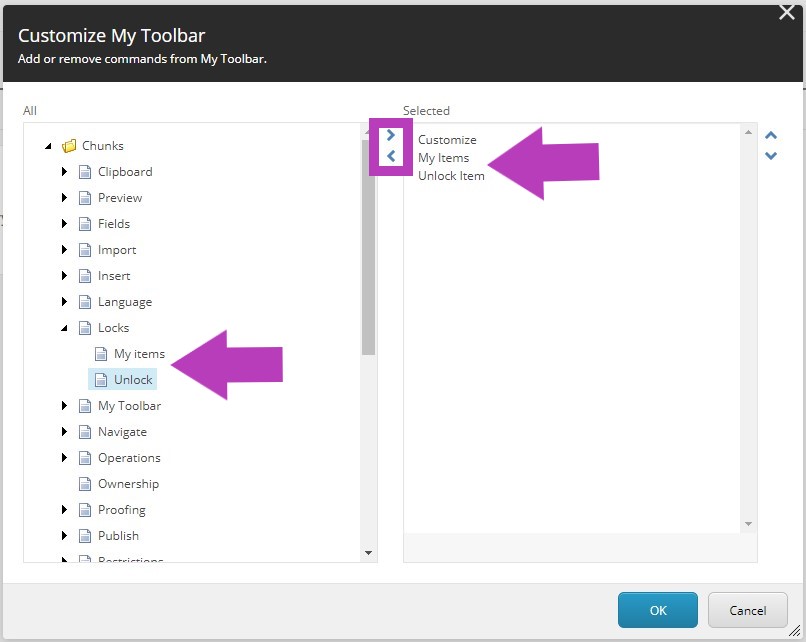
Navigate to your "My Toolbar" tab. Click the Customize button.

A popup will open allowing you to add and change the order of the tools you want. Similar to the course selector, a content tree of the tools you can add will appear with add and remove arrows.
To add a tool, select the item you wish to add from the left side pane and use the middle arrows to add or remove the tool.
Alternately, you can double click the item in either window you wish to add or remove and it will move to or from the Selected window.
What Tools should I add?
The tools you use most often may vary slightly from person to person, dependent on the role of the user within the catalog.
Following is a list of buttons you may consider adding to your toolbar. The tools will be listed by the item they are located in. NOTE: The tools listed below will be the most helpful to you and are used most often for catalog procedures.
Operations
You may not need to add all of the following buttons. For example, only administrators in the system can Delete or Move an item, so general users do not need to include them. The Replace button is helpful for administrators who are managing a Curriculum Management system but is not usually recommended for general users to use either.
However, Copy To and Duplicate, can be used by any user and are recommended for general use.
- Replace
- Duplicate
- Copy To
- Move To
- Delete

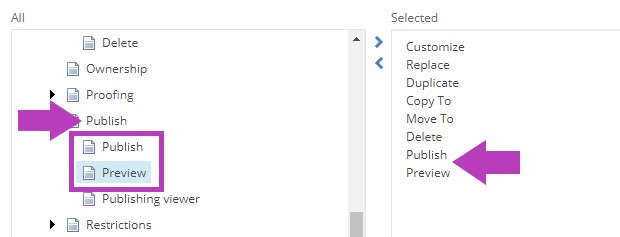
Publish
Only administrators can utilize the Publish button, but Preview is important for all users to preview catalog pages prior to and after edits have been made.
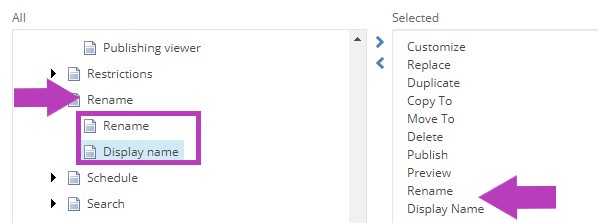
Rename
The Rename and Display Name need to be updated by every user when an edit is made to the Title field of an item (see Editing the Title Textbox). These fields also need to be updated when the Subject Code or Number field are edited in a Course item (see Editing Courses).
It is recommended that every user have these buttons added if customizing the My Toolbar because of the requirement to update these fields for the mentioned changes.
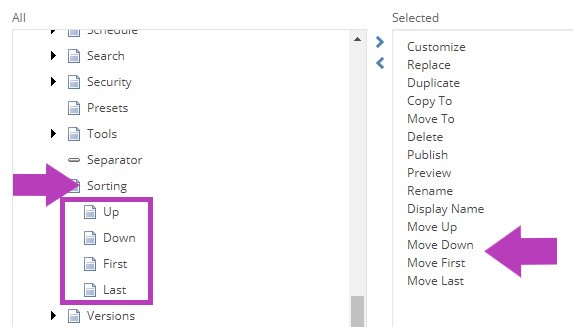
Sorting
The sorting buttons are important for reorganizing items within the content tree.
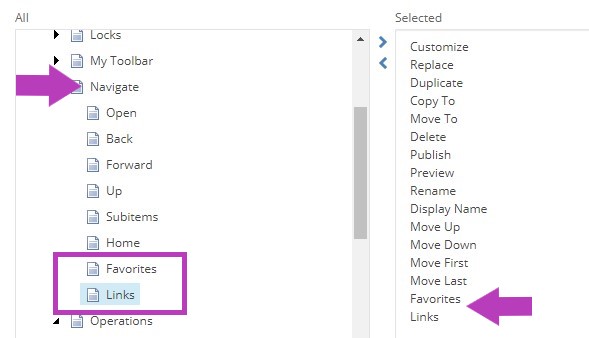
Navigate
Favorites allows you to bookmark a catalog, or a section/item of the catalog that you may frequent. You might not use or have need for this button, but it is a great shortcut to access the catalog items when editing.
Links allows you to see a list of items the selected item is linked to in the catalog. This is most helpful for courses and shared content. For courses, the links button will show what program tables a course is linked to. For shared content, it allows you to navigate to the parent item of a clone or see where the items clones are located.
Versions
This will be most helpful to an administrator for approving/tracking resources. These buttons allow you to Compare, Remove, or view the list of different Versions of an item available in the catalog. Basic editors do not typically need this function, but have access to use the Compare button to see changes made to an item.

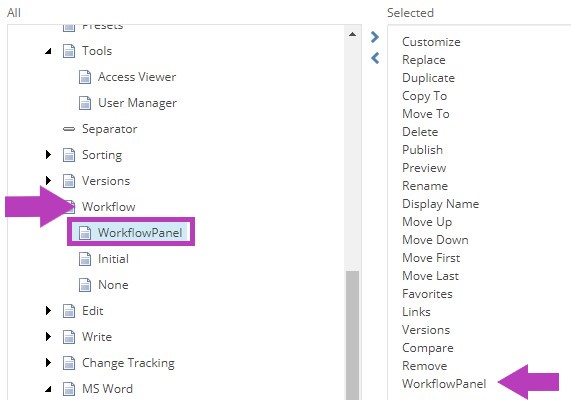
Workflow
The workflow panel is important for any user. It allows you to promote or approve items you are working on without having to navigate to the workbox.
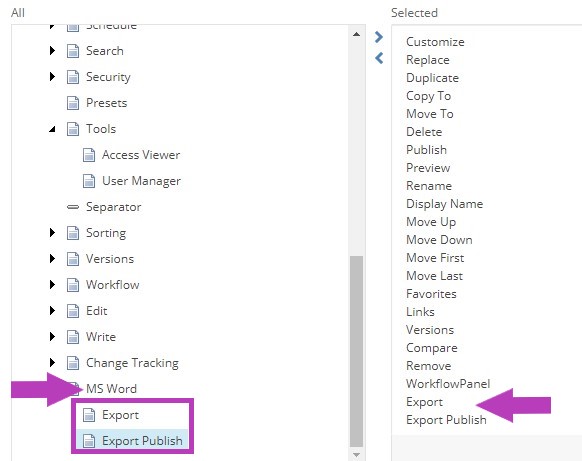
MS Word
Anyone can export the catalog or a section/item of the catalog to a Word document. "Export" will export anything that has the "include in print" checkbox checked regardless of the workflow state. The "Export Publish" will export anything that has the "include in print" checkbox checked that have been approved through the workflow and published to the live site.
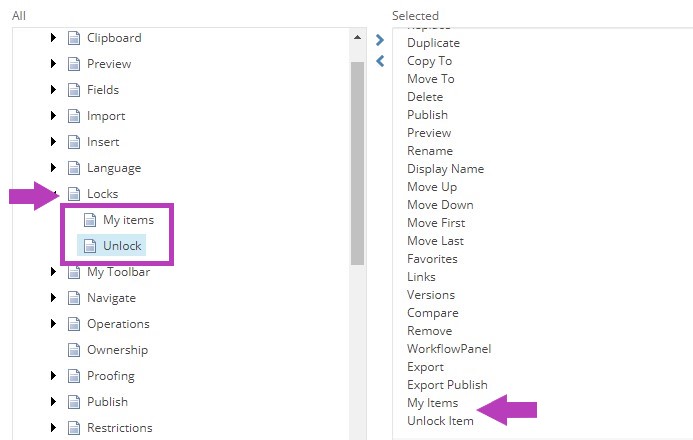
Locks
The My Items button will allow you to view any items you currently have locked within the catalog. This can also be viewed in the Draft workbox as well.
The Unlock button is useful for administrators to access if an item is locked by another user and it needs to be unlocked for access.
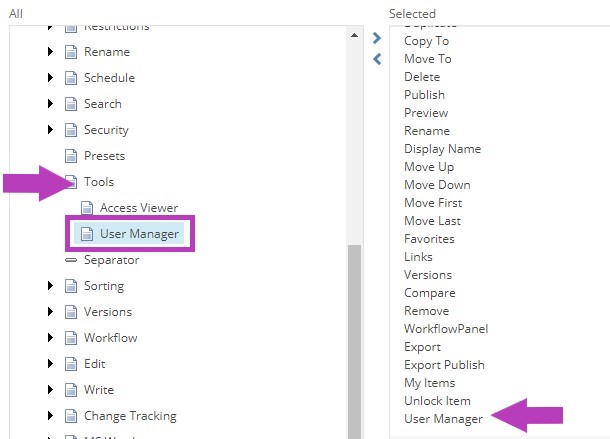
Tools
An administrator can easily access the User Manager with this button.
After all tools have been added click the OK button at the bottom of the window. The tools will now be present in your My Toolbar.
If you would like to organize how they appear on this toolbar first, follow the below instructions prior to clicking OK.
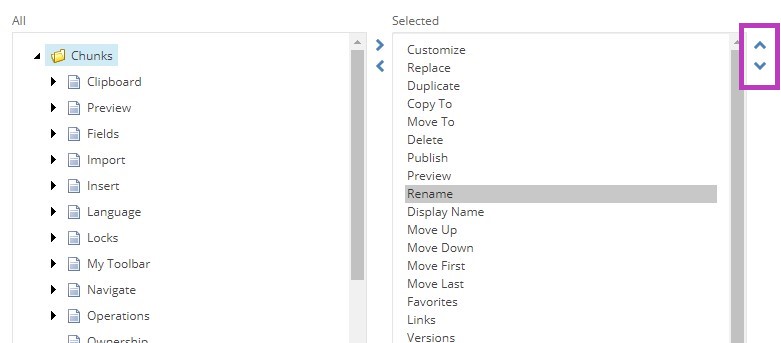
Organize Your Toolbar
You can change the display of tools in the customized toolbar by selecting a tool in the right pane and using the sort arrows to move the item up or down. To see how the change has affected the organization click the OK button at the bottom of the window.
Separator
To separate the tools on the toolbar as needed, add the Separator from the All list to specific points within the list of selected tools:
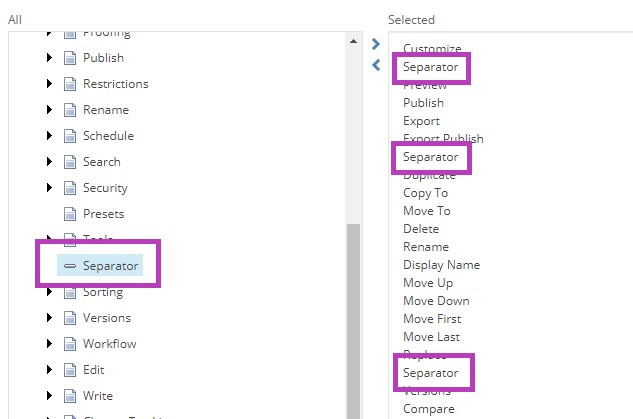
You can add as many Separators as desired to organize the display of tools on the My Toolbar.
