Pasting Outside Content within the Rich Text Editor
When pasting text from an outside source, always use the “Paste as Plain Text” option, either by right clicking your mouse, Ctrl+shift+V, or using the “Paste Plain Text” button in the ribbon on your Rich Text Editor. Then apply the appropriate style via the left hand style menu.
An "Outside Source" is any document, email or webpage you are copying content from to paste within the editor.
Styles are needed to apply the correct tags to the text that has been pasted or created within the editor. This is to ensure that the correct formatting is applied and consistent throughout the catalog when it is viewed live.
Once you have pasted the plain text:
Select the new content by simply clicking into the new content by paragraph; you only need to put the cursor in the appropriate paragraph to apply a style there is no need to highlight it. Styles available via the left hand drop down menu are variations of body text for general content/paragraphs/lines of text. There are SubHeading and Heading styles present within this list to use as well.
The formatting INSIDE the content editor is NOT what it will look like on the website or in print (fonts, etc.) Styles in the content editor display in a generic style for easy identification. The style specific to your institution will be displayed within the web template for the catalog and can be reviewed via Preview when editing. The purpose of styling is to apply the correct tags to text, so the website knows what text needs to apply what style tags.
When it comes to regular Headings (Titles), the position of the item in the content tree determines what heading it will take on, Heading 1, 2, 3, 4, etc. Additionally, the level of the item is reflected in what heading style is applied in the print export. SubHeadings/available Heading tags are to be inserted within the text of an individual item.
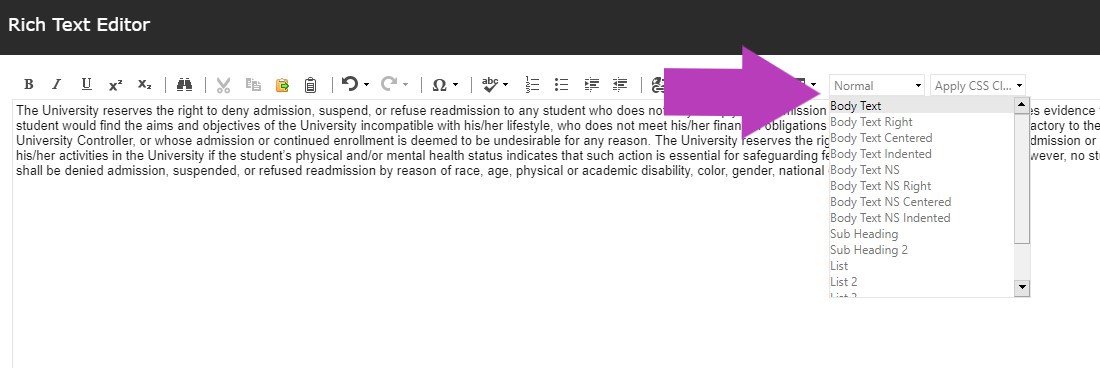
Using the left drop down pane, select the style you want to assign the content your cursor is within.
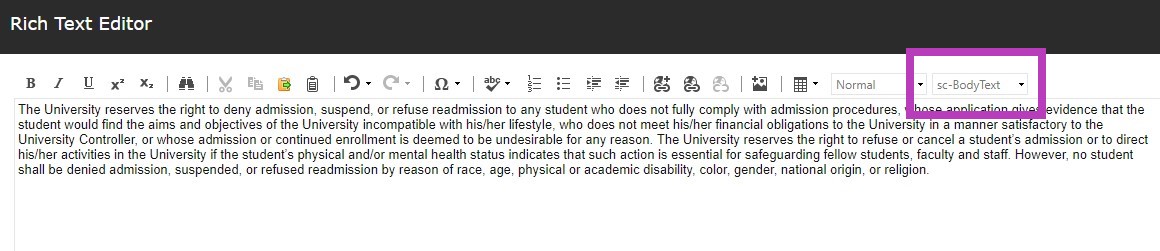
NOTE: The left hand pane will display the style you can apply to the text within the rich text editor; the right hand pane is for informational purposes only and will portray the class the web template will be applying to the text.
If Bold, Italics, or Underline is applied to the text, the right hand pane may not show exactly which style is applied to that text.
These styles are to be used for the general text and subheadings/headings within each page, for lists and tables there are additional buttons to assist in applying the correct styling/formatting.
DO NOT apply styles from the left hand drop down list to text within tables and lists. See Styling Lists or Styling Tables for more information.
Always “Accept” your changes with the Accept button on the lower right hand corner of the rich text editor. And Save your changes with the Save button in the upper left hand corner of your tool ribbon. If you navigate away from the item you have been editing, the system will alert you to save your work.
Note that this will not show on the live site until it is formally approved and published by an admin.
The item being edited is available for editing until submitted through workflow.