The tabs that should be visible across the top of the Content Editor are
- HOME
- NAVIGATE
- REVIEW
- PUBLISH
- VERSIONS
- SECURITY
- MY TOOLBAR
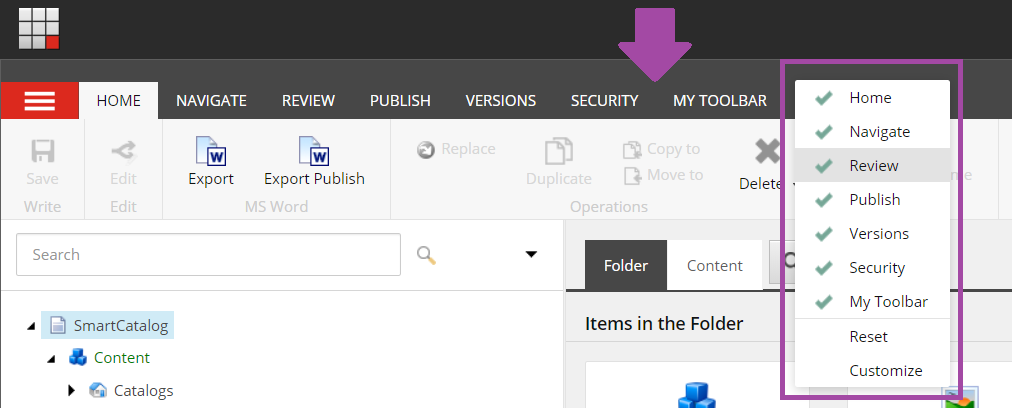
If one or more of these tabs appears to be missing, right click within the space that the tabs occupy within the header of the Content Editor.
This will open a window with a checklist of the tabs available. All visible tabs will have a checkmark, check any boxes that are not already checked and this should resolve the missing tab:
Following is a definition of each tab and the buttons/features that are available within each one:
Home Tab

Save- Saves any changes made to the item. Alternatively, if you click on the item again in the content tree or navigate to another item, the system will alert you with an option to save any changes that you have made.
Edit- Locks/Unlocks items, shows workflow status of a selected item in the content tree and provides workflow buttons for selected item. The Edit button is a light blue shade when the selected item is locked for editing.
Export- Exports the section/individual item that you have selected along with any child items to a Word document no matter what the workflow status is. Selecting the Catalog level will export the entire catalog or handbook.
Export Publish- Same as Export, but only exports items/versions that have been published to the live site.
Sorting Tools- Blue sorting arrows and Move To buttons move items in the tree. This will be reflected in the Navigation Menu on the live site once the catalog is published.
Move To- A pop up of the content tree will appear for you to select the location you wish to move the item to.
Copy To- Copies the item to another location in the catalog. A pop up of the content tree will appear to select the location.
Duplicate- Copies the selected item in the same location in the content tree.
Replace- Used when replacing an old course with one that has been changed, approved and created through the Curriculum Management System or when replacing a course to be archived with a newly created course. NOTE: This button replaces the selected item and relinks the new one automatically. The replaced courses is removed entirely and this action cannot be undone.
Delete- Used for Deleting items. Only Admins can delete items, please see Deleting Items.
Rename- Related to the URL, cannot contain special characters, what the system uses to differentiate items in the system. No two sections should have the same rename, unless they are Degree Requirement folders or Requirement Lists.
Display Name- Name of the item in the content tree of the IQ system. This is NOT the name of the item on the live site. This name is never published publicly and is for use only among users.
Review Tab

Workflow- Displays and gives access to workflow action buttons only when an item is in a workflow state. These are the same buttons that appear in your workbox. For more information see Using Buttons in the Workbox.
History- Same button as “More” in the workbox. Shows comments and the history of the item currently in the workflow.
Check-In This button is only present when the selected item is in a workflow state. Clicking this button will unlock the item. Once an item is unlocked it becomes visible in user's workboxes that have access to that particular item and workflow state.
My Items – Keeps track of what you’re currently working on (what you’ve locked). Selecting this button triggers a pop-up. If it’s blank, could be browser related. Grab the edge of the pop-up and stretch it out.
Unlock - Appears for Administrators if an item they have selected is locked. Allows them to unlock the item.
Archive- See Archiving.
Navigate Tab

Favorites- Used to bookmark a page/item in the content tree. This is a nice shortcut if you are responsible for only specific sections of the catalog or if you are working on a specific catalog item for a prolonged period of time.
Links- Will show if the item is referenced (linked to) by another item in the catalog. When a course is selected, you may use this button to find out what program tables it is linked to. This can be useful when deleting courses or updating Rename fields.
Links to the selected page are listed under the title of Items that refer to the selected item:, if no links are present under this title, there are no links to the selected item. If there are listed items under this title, you can click each listed link to navigate to the catalog item to perform any updates or remove any of the links.
Checking Course Links
Versions Tab
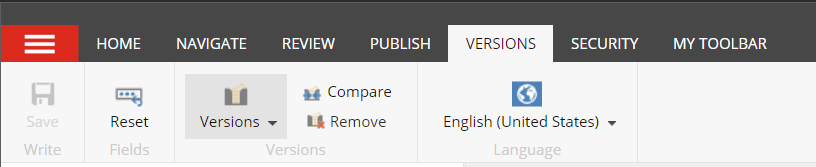
Remove- Remove current or selected version of the item.
Compare- Compare between versions of the selected item to see changes made through the life of an item.
Versions- This button will produce a list of all versions of the selected item within the catalog. Dates/times are attached to each to show you when it was created.
Publish Tab

Preview- A window will open up in a new tab displaying how the selected item will look once it is published to the live catalog pages. Any user can use this button and this is recommended prior to editing if you wish to review the content on the page first. If the button doesn't appear to be working make sure that your browser isn't preventing popups.
Publish- Administrators can publish the catalog with the drop-down arrow next to the word Publish. For more information see Publishing.
Configure Tab

Clone- Administrators use this button to clone an item from the shared content into a catalog/handbook, See Editing/Creating Cloned Items.
Unclone- If a clone should no longer be linked to the shared content, it can be uncloned, which will remove the relationship between the items.
Security Tab

User Manager- This button is one way to launch the User Manager to edit a user's permissions/roles. Please see the information HERE for further direction of this process.
My Toolbar

See Customizing My Toolbar for further directions regarding this individual user platform customization.