Step 1: Selecting and Locking an Item
- Select an item from the Content Tree. Use the expanding folder buttons (>) to navigate to the correct item within the tree, then select it. The item will then display on the right side of the screen.
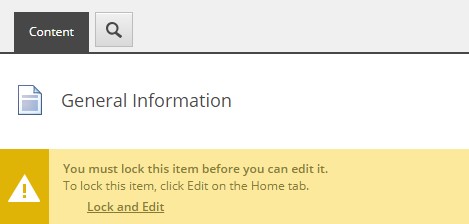
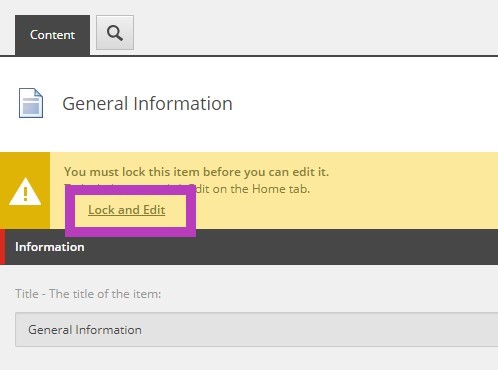
Yellow warning bar:
This is the area that will serve as a “warning” bar. It will point out if you do not have access, if someone has locked the same item before you, if an item is not in the final workflow step and therefore will not be published until it is, what version will be published instead, whether an item is a clone, etc. Always pay attention to the Warning Bar message.
- To make an edit, first click “Lock and Edit” located at the top of the screen within the yellow warning. When “Lock and Edit” is clicked a new version of the item is created. This new version can be edited, saved, and promoted through workflow. After it gets approved and when the catalog/item/section gets published the new version replaces the previous version on the live site.
- If the yellow warning bar is displaying a message that you do not have "write access" to this item you have selected, there are a couple reasons why this could be displayed:
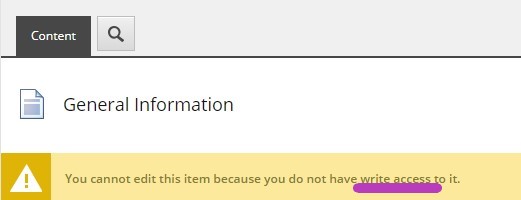
- The item is in a workflow state out of the user's reach.
- The user does not have permissions to this specific item/section of the catalog/handbook.
- If the item is currently locked by another user you will also not have access to it and a different warning may be presented providing this information:

- The first message describes that the item is currently locked by another user. Once the item completes the approval process or the current user unlocks it, the item will be available to access once more.
- The second message is telling the users that the item is currently unapproved and when published this specific version will not publish to the live pages until approved. It also provides the previous version that will be published instead.
- Once you have clicked “Lock and Edit”, the fields are made available for editing.
Always “Accept” your changes with the Accept button on the lower right hand corner of the rich text editor. And Save your changes with the Save button in the upper left hand corner of your tool ribbon. If you navigate away from the item you have been editing, the system will alert you to save your work.
Note that this will not show on the live site until it is formally approved and published by an admin.
The item being edited is available for editing until submitted through workflow.